


Save money by baking at home!
Along with traditional baking, home-made bread rolls are one of the most rewarding things to bake at home. Once you’ve mastered this simple recipe, you can start making so many different things. Round and long rolls, flat and tall rolls, this recipe is the gateway to something new and it starts in your own kitchen.
Some people are happy to have others make rolls for them or get them from the store. and If you’re reading this still, maybe you want to give it a go yourself though. We were curious to know how to do it and decided to learn.
We’re very excited about the results, we want to share them with you!

Make these at home and save money!
You can use these home-made bread rolls for burgers, or anything else you might like. You can even heat them up and enjoy them with soup. If you make them smaller, there’s no reason that you can’t have them as dinner rolls either. Once you know how do do this basic recipe, you can progress to so many others and become the master baker of your home!
The secret of our humble home-made bread rolls
Let us share what we have learned from making home-made bread rolls. Firstly, just relax and everything will turn out fine! Flour is cheap, and water is cheap. Time is valuable though, so stick with us and we’ll show you how to save time while making these home-made bread rolls.
Use fresh Ingredients!
If you’re starting from scratch and you don’t have anything in the cupboard, this is easy. Just go out and buy it all. If you have some things in the cupboard, well flour that is, just check to see how long you have had it for. Fresh bread relies on having fresh ingredients and if your flour is old, the results won’t be as good. Quality ingredients don’t mean it needs to be expensive. It is possible to get results similar to your local bakery and at a fraction of the cost. We will show you how to save money by baking home-made bread rolls in your home kitchen.
What kind of flour is best for home-made bread rolls?
With so many types of four available, it’s easy to be confused, but there are just a few simple points to understand about flour:
- Make sure the flour is fresh.
You can’t make fresh-tasting bread with stale flour. - Each type of flour has its’ own unique property. As an example; All-purpose flour contains less gluten when compared to bread flour. And, whole wheat flour has a high level of absorbency and needs more water than highly processed flours. Confusing?
Let’s keep it simple, and focus on the flour we need for making our home-made bread rolls.
In fact, we’re just going to use plain flour. You might know it as all-purpose flour depending on where you live.
All-purpose flour is probably the most inexpensive flour on the market. This flour has a protein content of between 8 to 11%. All-purpose flour is a blend of high gluten content hard flour and softer flour and for the record, all-purpose flour is the US equivalent to Australia’s “plain flour”.
Let’s get started with our Home-made bread rolls
Home-made Bread Rolls – STEP ONE:
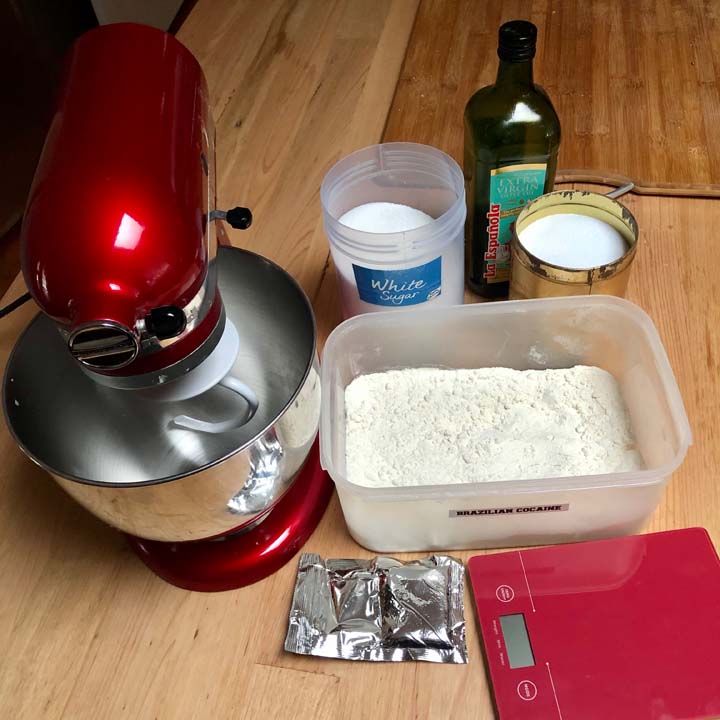
Gather all the ingredients. Please start by doing this step! You will have a smooth and trouble free bake if you do this. There’s nothing more annoying than getting part of the way in and finding that you are missing a key ingredient! Sometimes you cant fix the bake if you take too long to go find something or have something completely missing.

Home-made Bread Rolls – STEP TWO:
Weigh your flour. Yep. we’re not using cups and variable measures. They are the fastest way to mess up your bake. Flour compresses so easily and measuring it by the cup full can have a weight difference of up to 30%. That can really mess up your bake don’t you worry about that.
Measure out 500 grams of flour.
Home-made Bread Rolls – STEP THREE:
Add a teaspoon of sugar, this will give the yeast something to feed on and allow the home-made bread rolls to rise.

Home-made Bread Rolls – STEP FOUR:
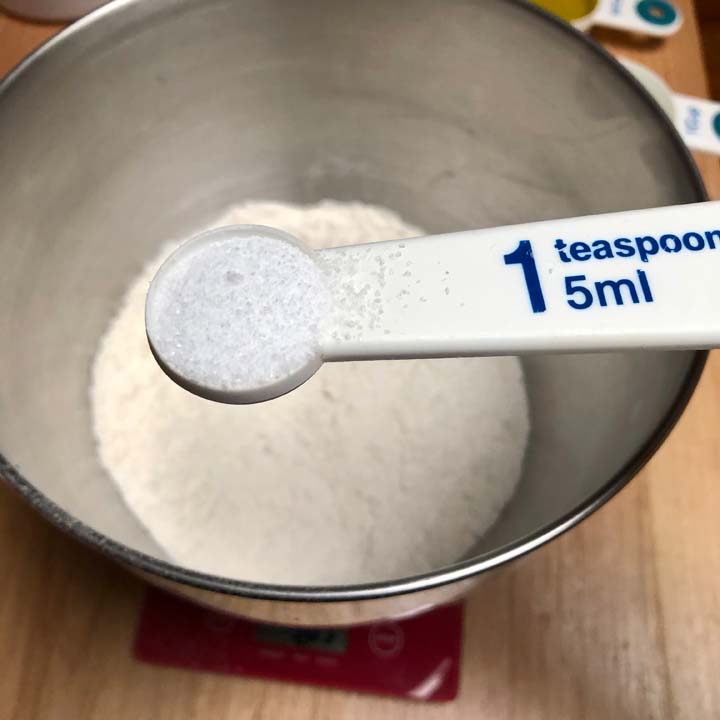
Add a teaspoon of salt. Salt gives the home-made bread rolls a bit of flavour and salt affects the yeast and overall rise of the rolls.
WHile, you’re at it, at two teaspoons of granulated yeast. If you want to measure it, that is around 7 grams. Using a spoon will prevent you from adding too much to the bowl and messing things up. You cant take it out once it’s mixed in with the flour.
Home-made Bread Rolls – STEP FIVE:
Need a little bit of prep work here. Run the hot water tap until the water feels a little bit warmer than body temperature. With your finger under the tap, run it from cold, as it warms up, it will begin to feel about the same as your body temperature, let it go just a little bit more, then it’s hot enough. If you want to be precise, make it 40 degrees Celcius. Fill a small bowl with this water.
Because we are using weight now and not cups for measurement, you will be pouring the water into the flour. So you can fill a jug with the warm water and just use what you need shortly.
Adding the liquids
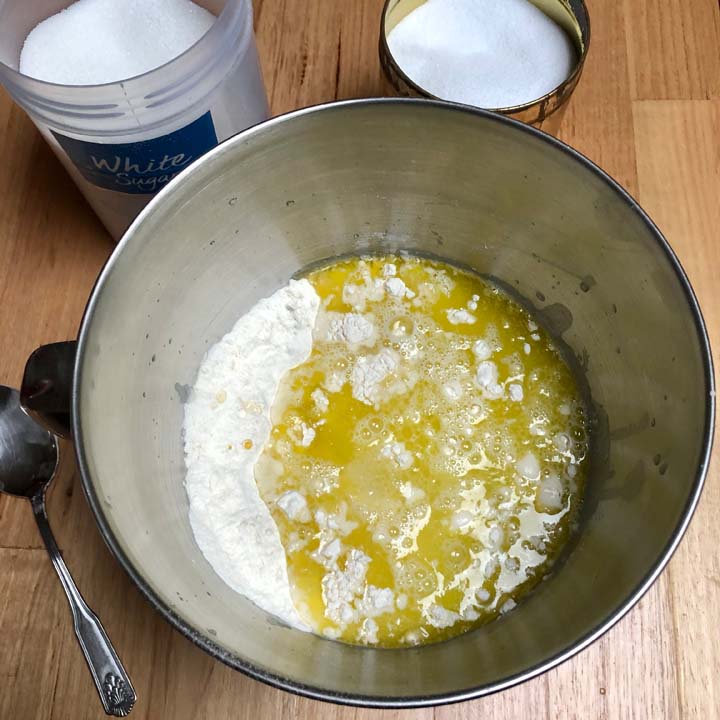
Put ¼ cup of olive oil in a bowl. Yes I know we’re weighing things, but with oil, we think it’s nice to have a general idea of the amount of oil you’re adding to use as a yardstick. Later when you begin to trial your own recipes, the oil may be something you want to change.
Pour 335 grams of water into the bowl. You will now have flour, salt, sugar, granulated yeast and oil in the bowl and the water you just added. Now it’s time to mix it all together.
Use a spoon and mix it gently to combine it. We don’t always do this, but it is a good idea because when you turn on the mixer, sometimes the flour can go everywhere. SO, mixing it first to combine keeps your kitchen tidy.
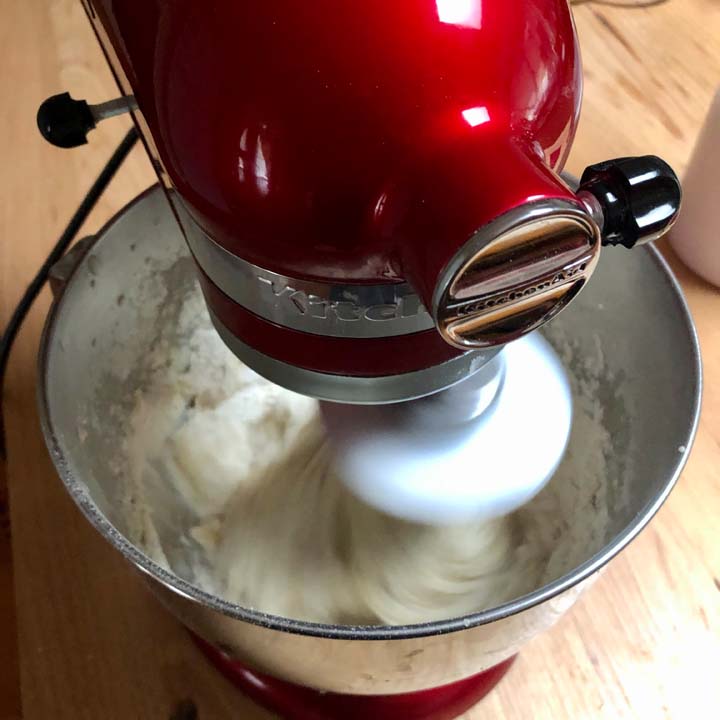
Home-made Bread Rolls – STEP SIX:
Mix using a stand mixer with a dough hook attachment. We find it takes about 10 minutes to get the dough super soft and smooth. You will know the dough s ready when it’s smooth and it comes away from the bowl and dough hook without being sticky.

While the mixer is doing its work, lightly oil a bowl. You will be adding the dough to this once the mixing is finished. Prepare it now so you can keep up with the recipe!

Here’s the dough once it’s finished being mixed. It’s ready to take it to the first rising stage.

Place the dough in an oiled bowl. This will make it easy to take it out without it sticking.

Cover with a tea towel, pleace in a warm place for 30 minutes, or until the dough has doubled in size.

Here’s the dough, doubled in size after just 30 minutes. Scroll up and check the original size. You can use a combination of Pythagoras theorem, pi r squared, and some other magic to calculate the area, then multiply this by the spherical elevation. Then you can calculate the total volume of it when compared to the pre-risen dough. This is under the assumption that you made the same calculation on the pre-risen dough. You can then reliably compare the two to confirm whether it has risen to double size or not.
Or, you could just eyeball it like we did. Thats near enough, not the end of the world if you’re a little bit out.
This shaker could save your life!
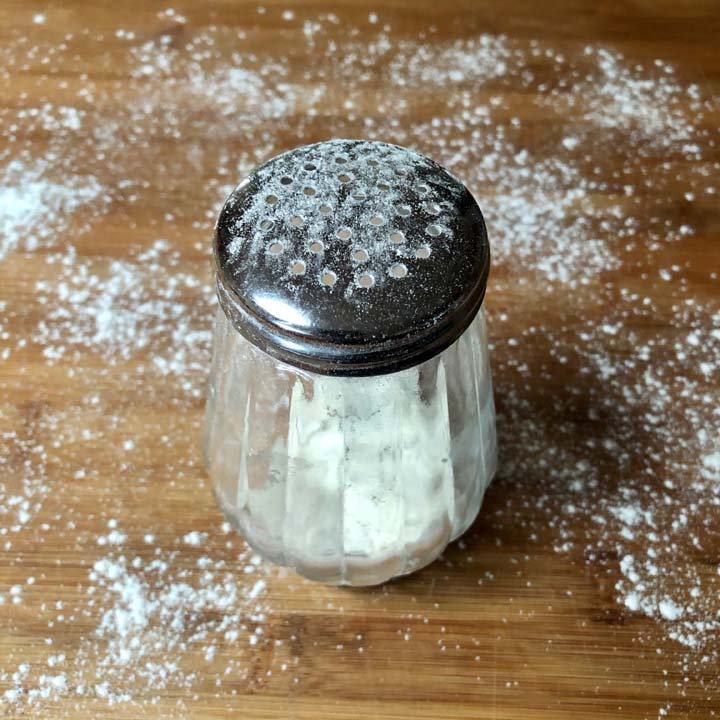
So this isn’t a recipe step but its so important we thought we would mention it. Get one of these little shakers and fill it with flour. We did and our life is better for it. You can use it to sprinkle flour on your work surface, or your hands. It’s so simple it’s ridiculous, and you don’t dip your grubby fingers into your flour bag and contaminate it.

Home-made Bread Rolls – STEP SEVEN:
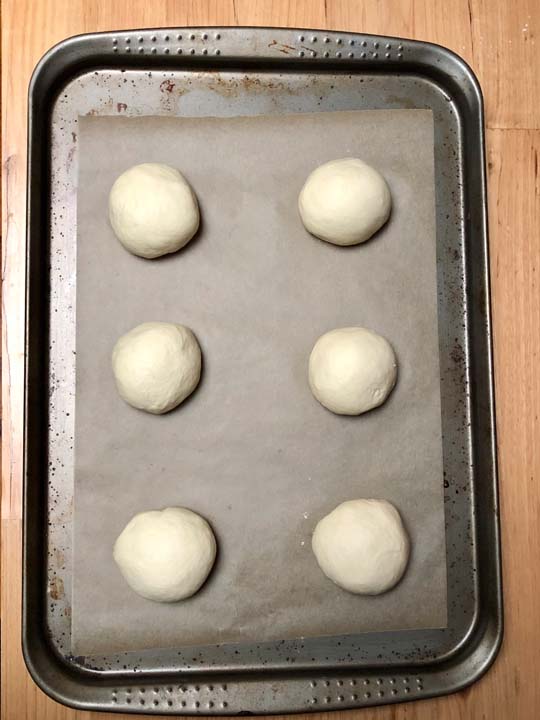
Remove the risen dough from the bowl and divide the dough into six equal portions.
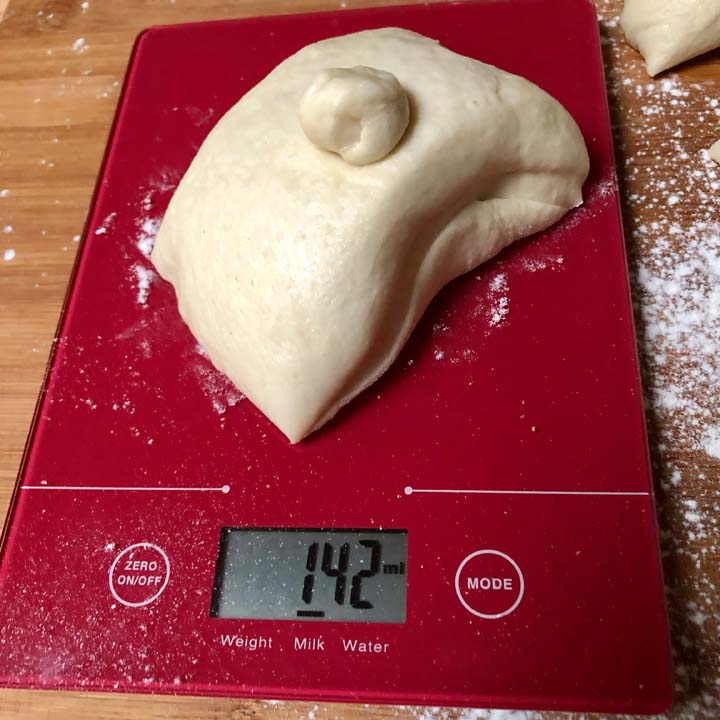
Using scales will help you get the dough sizes more uniform/ You can just snip a little chunk off here and there and add them to the other dough balls until they ar close in size.
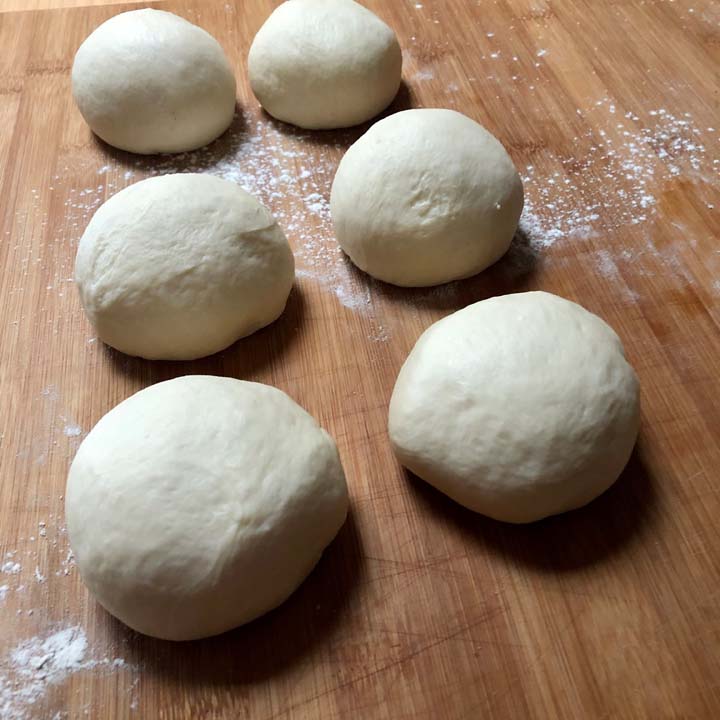
Here are the dough balls formed and ready to move to the next stage. Roll the dough in your hands in a tucking motion. The motion resembles repetitively folding the outer sides of the ball under and into the middle of the ball. This circular motion will quickly turn the dough into round balls.
Home-made Bread Rolls – STEP EIGHT:
Place the dough balls onto a lined baking tray with a little space between each of them. Cover them with a tea towel and leave in a warm place to rise again. This might take between 30 to 60 minutes or so depending on the room temperature.
It’s time to preheat the oven now, this will get it nicely to temperature before you put the rolls in for baking.
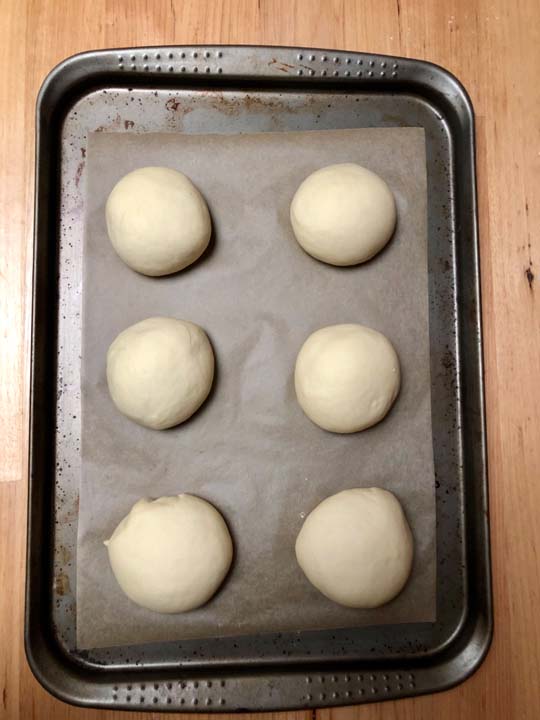
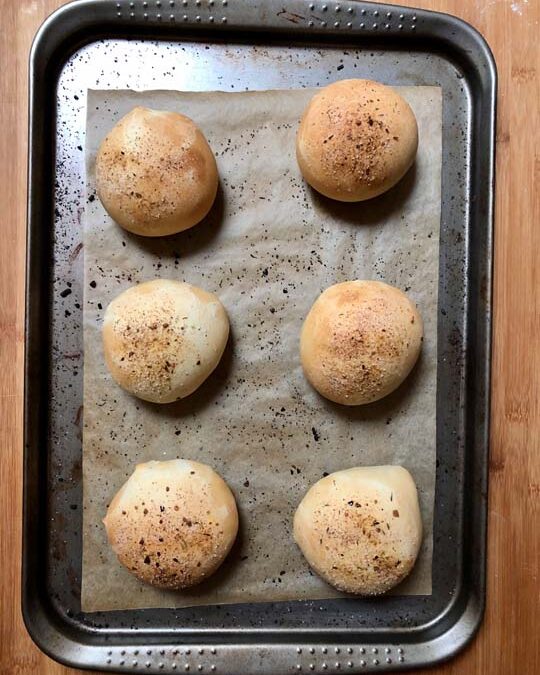
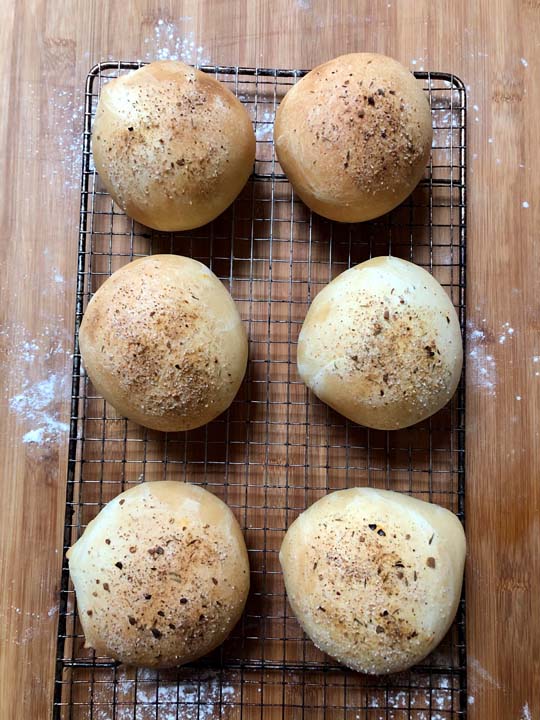
Here are the risen rolls, some of the have gone a little wonky but they will still taste fine!

Home-made Bread Rolls – STEP NINE:
Now it’s time to dress the dough and give it some flavor. We coated them with a light brushing of olive oil and then lightly sprinkled some garlic salt and mixed herbs on top. You can do it your way though, there’s no rules and you get to eat the results. You don’t have to restrict yourself to just one flavor, you can make a few different ones in the same batch.

Here are the rolls all dressed and ready for the oven. SLip them into the preheated oven and cook for 18 minutes, or until they are the color you like, (minimum 15 minutes or they will be doughy in the middle).
Home-made Bread Rolls – STEP TEN:
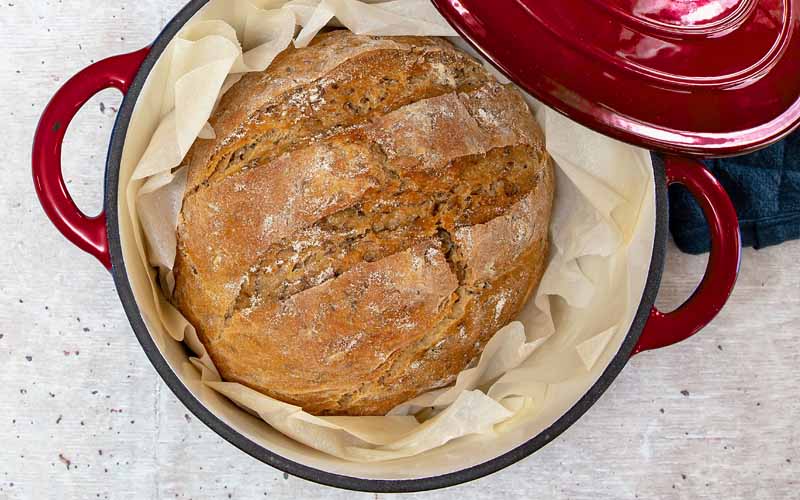
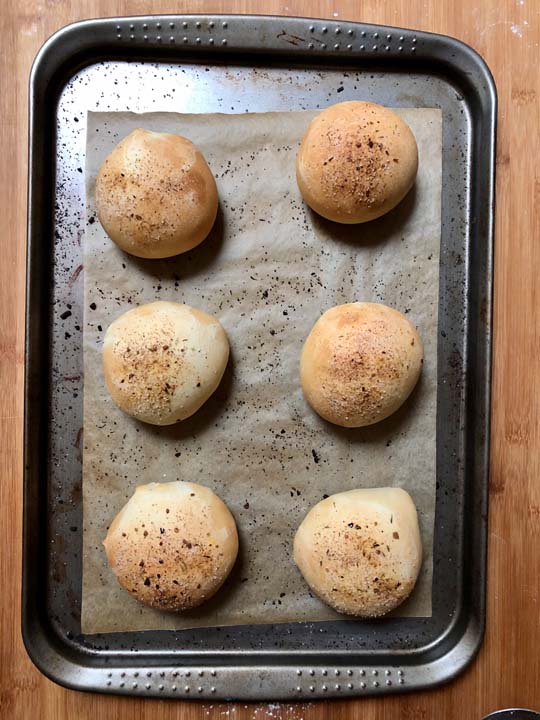
Once the baking is done they wil look a little like this. Notice the wonky shapes. With a bit moe care in the dough shaping we will do a better job next time! If you also notice the different colors, this is because our oven has a hot spot in it. You can avoid this by turning the tray around at about half way through the baking process. Because you opened the oven, you might need to add another minute to the cooking time.
Gettin’ up close and personal with these things. Yum!
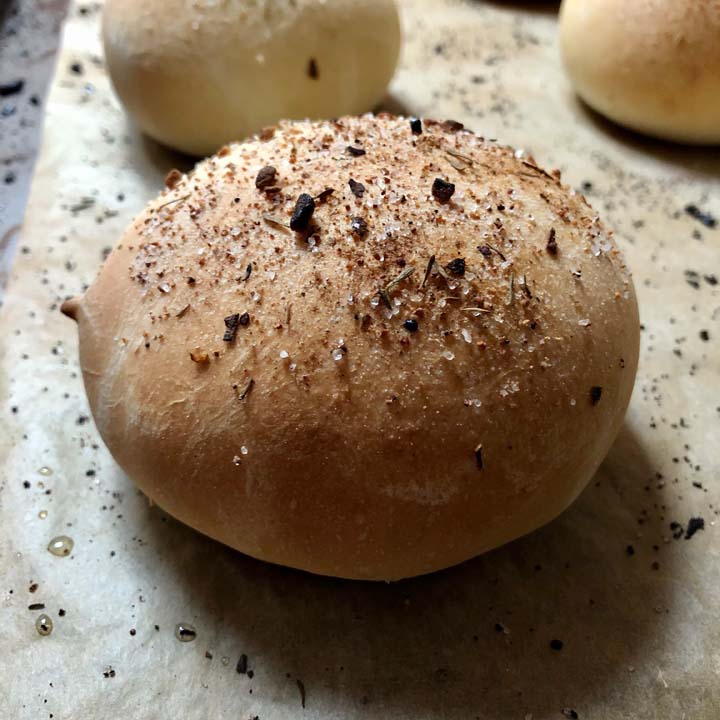

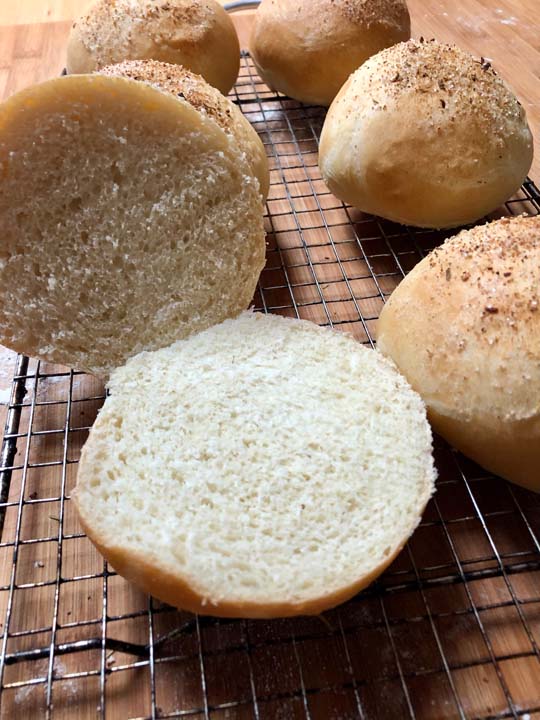
THe insides will be soft and fluffy for the first day or so and then tighten up after that. We like them on the second day when theres a bit more tension in the fibre, they seem to work a bit better for burgers then. All you need to do is make them the day before to use them for burgers. Of course it’s up to you, if you like them soft, eat them sooner.
Thinking of Making Our Home-made bread rolls yourself?
All you need to do is print out the recipe and tick off all the ingredients you already have. Then you will have a small and convenient list to take to the store. Preparation saves time. It’s difficult to resist marching ahead quickly, but getting all your ducks in order helps a lot. Even if it’s chicken you’re cooking.
Make it Now With This Simple Cooking At Home Is Fun Recipe:
Recipe Card

home-made bread rolls
Equipment
- Baking Tray
- Stand Mixer
- kitchen scales
- mixing bowl
- wooden mixing spoon
- tea towel
Ingredients
- 500 g plain flour
- 325 g warm water
- 1 tsp salt
- 1 tsp granulated sugar
- 2 tsp instant dried yeast substitute for fresh yeast if preferred
- 1 tbsp gralic salt (topping)
- 1 tbsp mixed herbs (topping)
- 62 ml olive oil extra virgin (¼cup)
Instructions
- Put stand mixing bowl on scales and add 500g of flour.
- Add all dry ingredients to bowl and stir to combine.
- Add oil
- With the bowl still on the scales, add 325g water.
- Mix with a wooden spoon until the mixture comes together.
- Mix in stand mixer until the dough forms and becomes smooth.
- Lightly oil a bowl, place the dough into the bowl, cover with a tea towel and leave in a warm place to rise for 30 minutes, or until doubled in size.
- Lightly flour a clean surface, place the dough on the surface and cut into 6 eaqual portions. Use scales if required so the rolls will be a similar siz.
- Preheat the oven to 200℃ (390℉)
- Form dougn portions into balls and arrange on a lined baking tray. Cover with a tea towel and place in a wam place to rise for 30 minutes. Or until the dough has doubed in size.
- Brush each roll with olive oil and lightly sprinkle with garlic salt and mixed herbs.
- Bake in preheated oven for 18 minutes, or until golden in colour.
More cooking at home is fun bread options:


 We help you to cook delicious food - simply!